I didn’t have plans to get anything from Nicholas Templeman when I first wrote about him last year, but it was hard to resist after I saw his samples. A former lastmaker at John Lobb of St. James, Nicholas has a keen eye for design and over seven years of bespoke shoemaking experience. His work as an independent shoemaker demonstrates this wonderful balance between conservative English taste and the kind of creativity that makes commissioning a pair of bespoke shoes seem worthwhile.
So I met with Nicholas last October when he visited San Francisco as part of his US tour. The first meeting with a bespoke shoemaker isn’t too different from what happens with a bespoke tailor. You flip through dozens of swatch samples – many more than what would be available through a ready-to-wear label – and then discuss the particulars of your order. If you’ve ever wanted to be overwhelmed with options, commission a pair of bespoke shoes. Suit jackets and sport coats differ mainly by pocket, button, and lapel design, but shoes can take any number of forms. I avoided the problem by telling Nicholas I would settle on a design later. After all, the lasts come first, so there would be plenty of time to decide on the particulars.
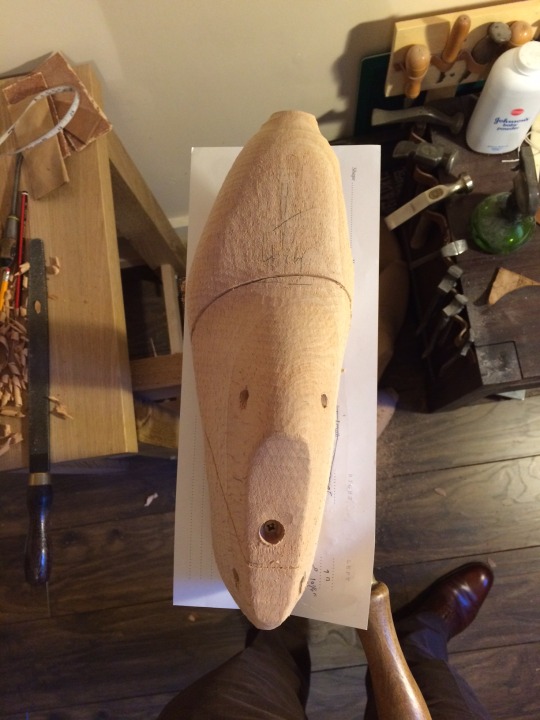
After taking a few tracings and measurements of my feet, Nicholas returned to London, where he ordered a rough turn in a few sizes bigger than what I would normally wear. From this massive material, Nicholas carved out my last, much like how a sculptor carves from marble. Any number of companies can provide rough turns nowadays. The biggest is probably Springline, whose primary business is in making lasts for ready-to-wear companies, although Nicholas gets his from someone else. Pictured above: a rough turn that would translate into a size 14 shoe, even though I wear a 9D. Below the rough turn is the piece of paper with a tracing of my left foot.
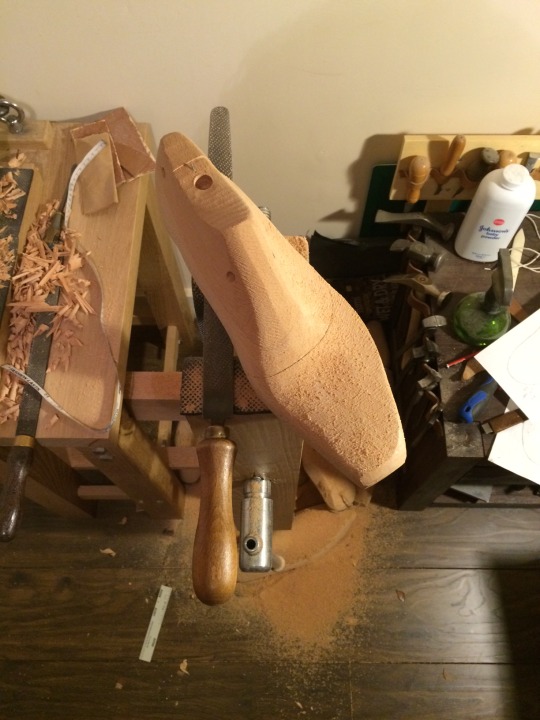
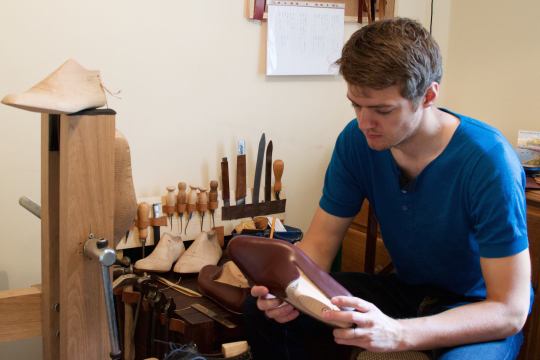
Then comes the shaving, which is a long, iterative process. Nicholas first gets the shape down with a large hinged blade known as a stock knife before shaping things further with a rasp. “When you’re removing large amounts of material, a stock knife is more efficient,” says Nicholas. Few makers use them anymore, however – they take up too much space and require too much finesse to operate. Plus, there’s the problem of keeping the blade sharp, which requires another set of skills altogether. Instead, many makers order stock Springline lasts and fine tune things as needed, but this doesn’t always work for customers who are difficult to fit or have special requirements.
Once the rough turn has been shaved down a little, like you see above, Nicholas sends the last out to be copied. Known as fellowing (as in, creating the fellow to the last), this is done on a big machine, where another rough turn is carved down to match the original. Here, the two lasts are still about a quarter inch too big all around, which allows Nicholas to fine tune them further once he gets them back.
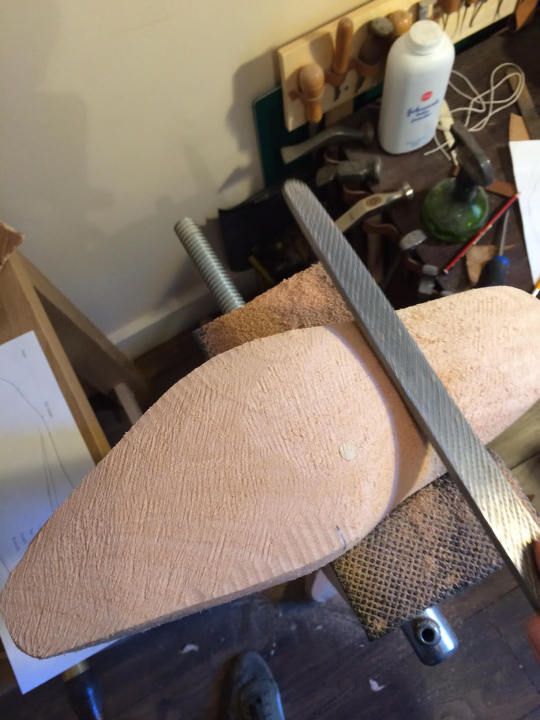
It’s hard to appreciate in this photo, but it’s the bottom of a last that’s most important. “The three dimensionality here helps determine how well the shoe will hug the arch of your foot, and whether the shape will accommodate your particular bone structure,” says Nicholas. “Ready-to-wear shoes don’t have that kind of shaping because they need to fit as many people as possible, so the fit is a bit roomy and flat.”
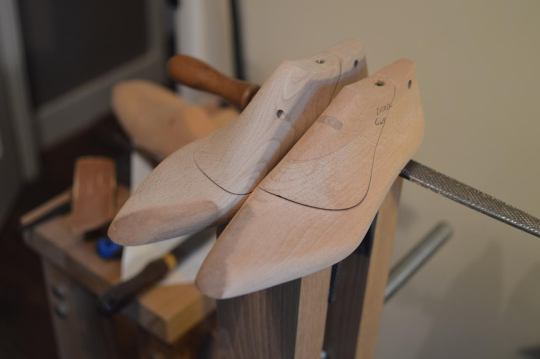
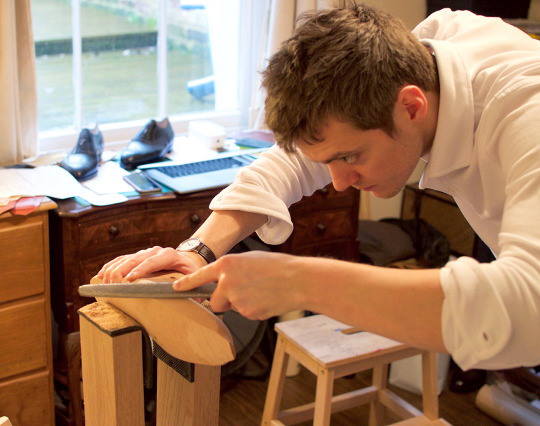
With enough shaving and sanding, you get a smooth pair of lasts like you see above, but what to do if too much material has been removed? Nicholas explains that lastmakers will often add a bit of leather (or sometimes even cork).
“Sometimes I’ll make something that I think looks good, but then return days later and realize the shape needs some adjusting,” he says. “So if I’ve taken too much off, I’ll take a bit of insole leather – which comes from the shoulder of the animal – wet it a bit, and then pull it over the last to make it take on a certain shape. The leather will then be glued down and allowed to dry before I hit it again with a rasp.”
Interestingly, the rasping turns the leather into a sort of napped suede, so Nicholas has to burnish the leather with a deer bone in order to smoothen it out. “Doing so helps the lasting process, so that you don’t get the two napped leathers pulling on each other. You want a smooth surface so there’s no friction.”
On Nicholas’ Instagram account, you can see this last, which has a few leather patches. On mine, there’s only leather at the inner toe areas. It’s amazing how smoothly the last transitions from wood to leather. Had the process not been explained to me, I would have thought those dark areas were just stained parts of the wood.

Finally, Nicholas pulls a bit of leather over the toe to get an idea of the final shape. “As is, it looks a bit pointy, but that’s because the shoe hasn’t been built up yet,” Nicholas explains. “There’s a lot of leather that goes inside a shoe, so as you build it out, the toe will look a bit more rounded.” In the photo directly below, you can see the shape my last has been modeled after.
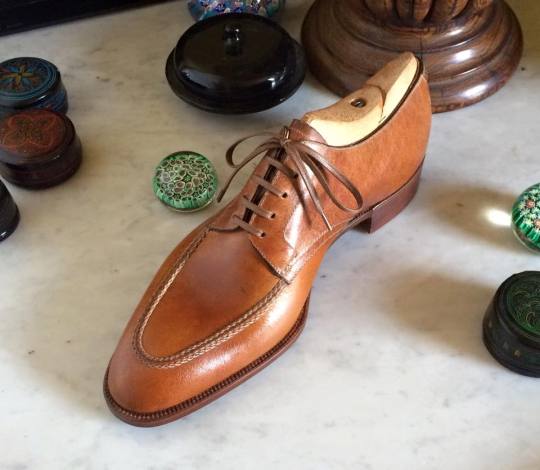
Working with Nicholas so far has been fantastic. In addition to taking photos and sending swatches, he recently took the time to stitch apron samples when I couldn’t decide between three different styles. And although his prices aren’t cheap, they’re a bit lower than his West End counterparts. If you’re interested in commissioning something, know that Nicholas will be visiting NYC, Boston, and San Francisco in April. As for me, I’ll be getting fitted for a pair of mid-brown Norwegians.